
Helm Chart Part 2 – Scheduler-form
Now that the Scheduler is in place, we have to have a form to send it data and retrieve results. Before we go into that, lets discuss OpenShift Local and how it sets your computer to get the OpenShift console UI. When you install crc it puts in place a Windows service.
- Red Hat OpenShift Local Admin Helper
This Helper service allows you to manage and configure the cluster directory from your computer. When you start your OpenShift cluster it also start two other processes.
- Crc.exe (of course since you ran it)
- Crc-background-launcher.exe (this helps manage the background processes that run and manage containers)
Your host file for windows also gets changed so you can actually use the API and console URLs. This host file also has entries so you can develop routes for you applications. This is important for the scheduler-form. For easy viewing and editing I would recommend getting the PowerToys application.
The host file has a lot of entries for OpenShift. You will noticed that most use apps-crc.testing as their top level domain. This is important because the Red Hat Windows service handles that top level domain and ensure you application gets to the right destination. We will setup a route named schedulerform.api.crc.testing for the scheduler-form. This will allow you to view the form and submit data to the scheduler.
To start let clone the scheduler-form form the gitlab.com.
$ git clone https://gitlab.com/keckler-dev/scheduler-form.gitYou will need to start up your OpenShift Local cluster. You will also need to login on the console.
$ crc start
$ oc login --token=……. --server=https://api.crc.testing:6443
Remember you can get your login token from the crc console. Click on Copy login command form the dropdown on your username.
Once you have cloned the repository, switch to the scheduler-form directory. The organization is similar to the scheduler repository. Since it has a web UI, you will have extra directories. Static and templates are added to handle the static CSS file and templates holds the html files. Take a look at get a feel to how it is setup.
In the helm directory under the templates is an extra file called route.yaml. This is where you are defining your application’s URL and how it is attached to the Scheduler-form Service.
In the spec section file you will have the host line. This is the URL you application is listening on. Noticed that the top lever domain is apps-crc.tesing. The ‘to’ sections defines the service that will handle the requests from the route. You can have multiple services to a route by adding alternateBackends to the route. You use the weight line to balance the amount of traffic to each service. You could use this for canary testing.
Lets get started, and deploy the helm chart for the scheduler-form. Ensure your are in the scheduler-form directory and execute the helm install command
$ helm install scheduler-form helmYou will see a new deployment called schedulerform. It will show 1 pod running. In the networking section you will see e a new service called schedulerform in Services. You can do some testing on the IPs in the pod to ensure everything is working properly. See post Helm Chart Part -1 Scheduler for instructions. Additionally you will see a new entry in the Routes section under Services.
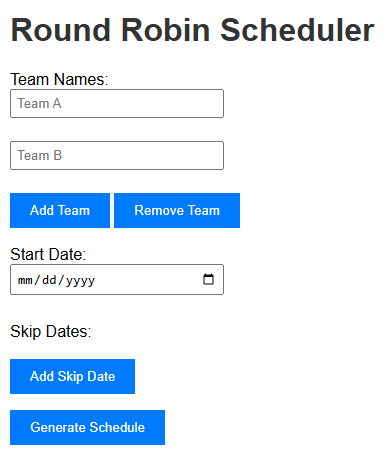
There will be a route called schedulerform. It will have a location http://schedulerform.apps-crc.testing. You will see that the service it is using is schedulerform. Click on the URL. A new window comes up with a form. You can use this form to input data. Once you click the Generate Scheduler button, the informations is sent in a POST to the scheduler service http://scheduler:8080/schedule. The results will be the json output of the scheduler and a list of the scheduler by week.
We do not need a route create for scheduler deployment because OpenShift allow communication in the same namespace. You can call any Service on the port the service is listening on in the same Namespace.
In conclusion, setting up the Scheduler-form in OpenShift Local involves several key steps, including cloning the scheduler-form repository, and deploying the helm chart. By following these steps, you can effectively manage and configure your OpenShift cluster, ensuring that your applications are routed correctly and can communicate within the same namespace.


